Sunday, October 23, 2011

TAGS

I love this idea. It’s easy, cheap and you can be as creative as you want!

projectwedding

I think I will create some to use as gift’s tags, to make bookmarks, to label all my supplies-boxes (right now they are a mess, I’m not even sure what I have inside!) …you see, there are tons of possibilities! Just try it!

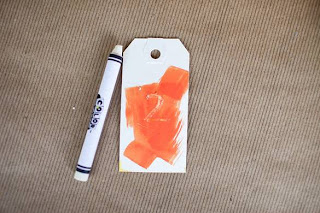
I give you a hint of how to do it....

but go to projectwedding to see the full tutorial!

I will show you mines soon—I hope! :)

Wednesday, October 12, 2011

I FOUND IT!

Do you remember that I was looking for something to put in my wicker basket? Well, I found it!!

Last week, I saw this branch lying on theground of the parking lot where we had our car. I liked it from the beginning. Although I thought (still think) it was a little too thin but as I really liked the shape, I decided to take it with me and see how it looked like.

So this is what I did:

I bought at the dollar store one of those floral foams (I’m not sure if this is the right name, but is one of those green squares/rectangles that are use to hold floral arrangements). I made a small hole in the middle and I placed my branch in it. Just to make it more stable I used some glue. I left it overnight, to make sure that it was dry (and also because it was late and I was tired! : ) )---That's also why I don't have pics of this! :(

Then I filled the wicker basket with some wood chunks that we had (we bought them last summer for some gardening but we never used them!). Well, the truth is that I only filled the top part with the wood, the rest was filled with some cardboard packing taken from our recycle bin.

So I put the cardboard, then some wood, then my branch glued to the floral foam and then I covered it with more pieces of wood. I was thinking of leaving it like that, but as I said, the branch is too thing so it looked like was missing something. Solution: another trip to the dollar store! I found tehre some artificial leaves that had the perfect fall colours. And the best part is that I even didn’t have to glue them, I just put them on the branch, using their natural spots and it worked.

I have to say that I really love the final result, perfect for the fall season…although I must hurry up because here we got our first snow last week!


Friday, October 7, 2011

MINI-GARDEN

I love to eat fresh veggies and fruits. And although most people think I’m crazy, salads are one of my favourite meals! Have you ever though how great would be to have your own garden?! I spent the entire summer thinking that we should have a garden at home, but I knew that was a lot of work and a lot of time!. Now summer is gone and we don’t have a garden… but a couple of weeks ago, I saw these ‘boxes’ on the street (yessss, I found them on my way home! :) )
I knew they had a spot on our backyard! This is our easy way of having a mini-garden at home!

Those are the ‘boxes’ as we found them----(I’m sure there is a more appropriate name but don’t know which, so if you know how to call them, please let me know and I’ll correct it!).

They weren’t too bad in fact. They just needed to be dressed up a little bit. So I sanded them, mostly to remove some kind of blue tape and glue that they had. Then I put the primer. I thought one layer would be enough, but I ended up doing 2 layers.

Once the primer was dry I used some painter tape to create some stripes. We wanted something fun and colourful, and we weren’t looking for perfection so we sprayed them, let them dry, and after that, put the soil and the lettuce seeds. And this is how they look like!

Now we are just giving them tons of love and water, and hopefully we will be eating a home-grown salad soon! :)